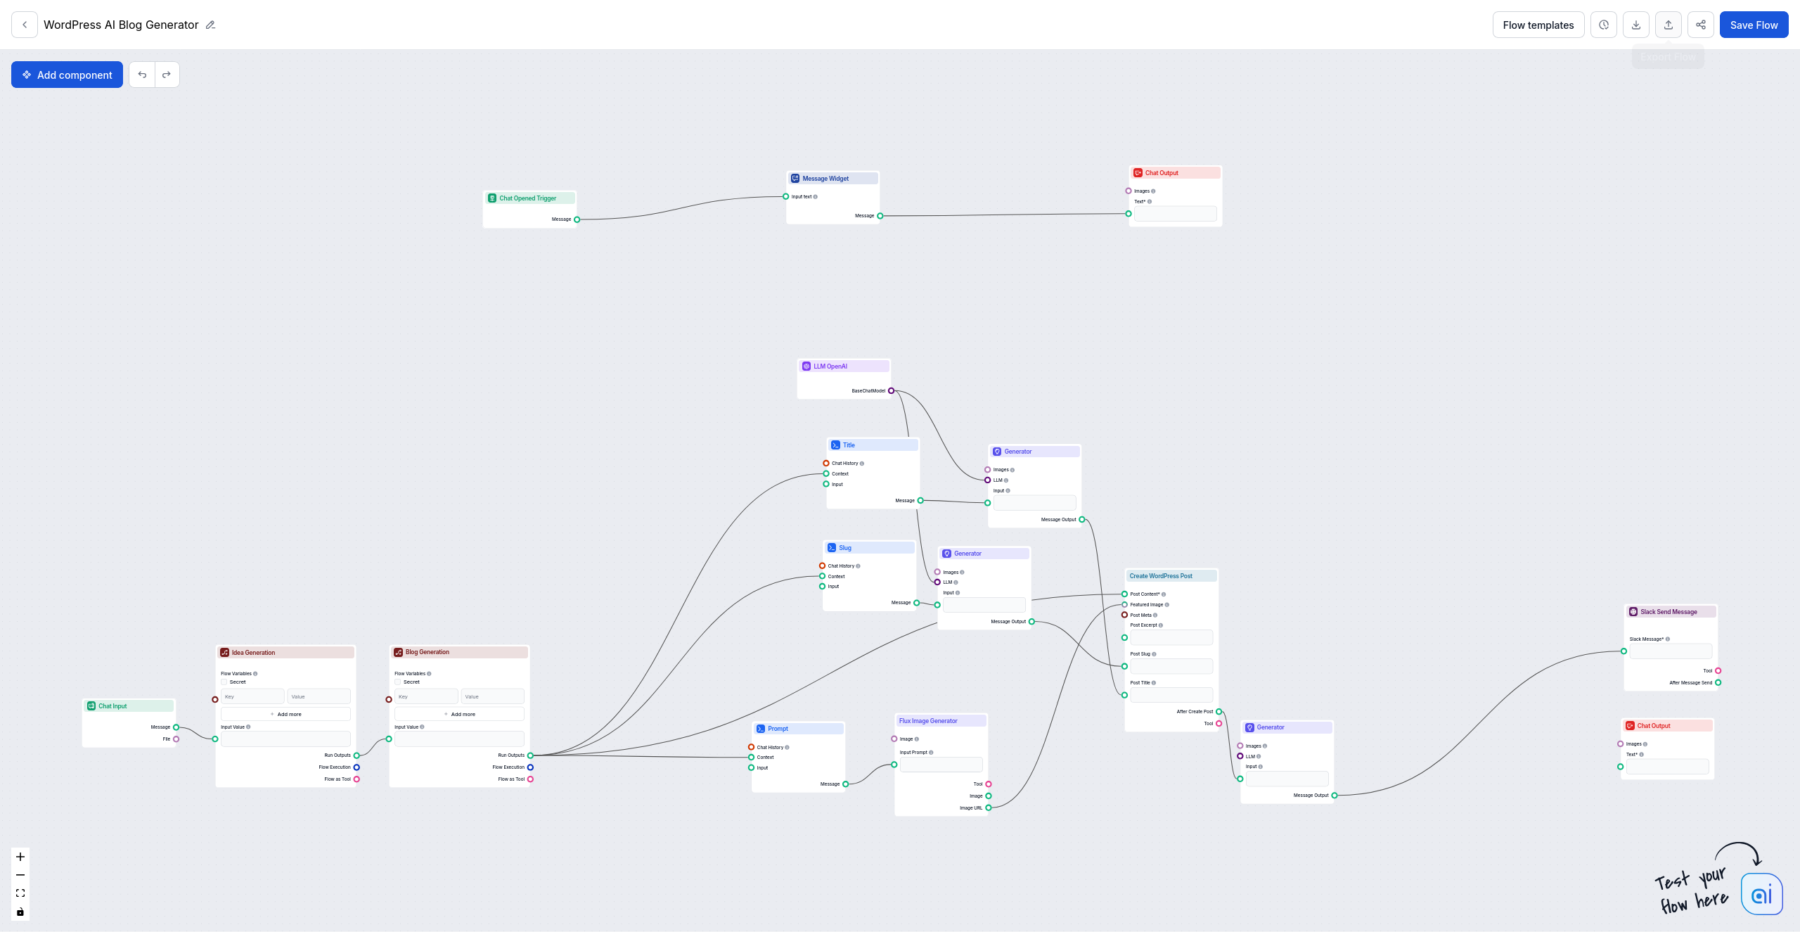
Welcome to our step-by-step guide on automating your WordPress post generation using FlowHunt! In this blog post, we’re excited to show you how to streamline your entire SEO content creation process, from sparking those brilliant ideas to automatically publishing them on your WordPress site. Plus, we’ll throw in an extra bonus: we’ll set up your Flow to run automatically every day at 8 AM, ensuring fresh content is constantly flowing to your readers. Let’s jump right in!
Step 1: Connect Your WordPress Site
Let’s kick things off by connecting your WordPress site with FlowHunt. You start by getting the necessary WordPress credentials:
1. Head over to your WordPress dashboard, and navigate to User > Profile. Make sure you are an administrator, or ask your administrator to do these initial steps.

2. Scroll down to Application Passwords. Input a name for your application and click Add New Application Password.


3. Now, go to your FlowHunt dashboard, and navigate to the Integrations section.
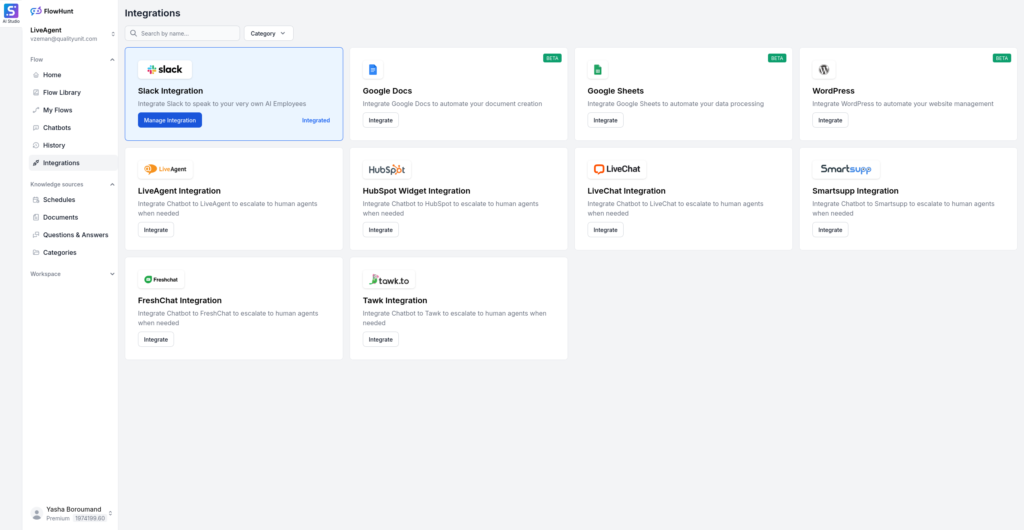
4. Click on WordPress to begin the integration process.
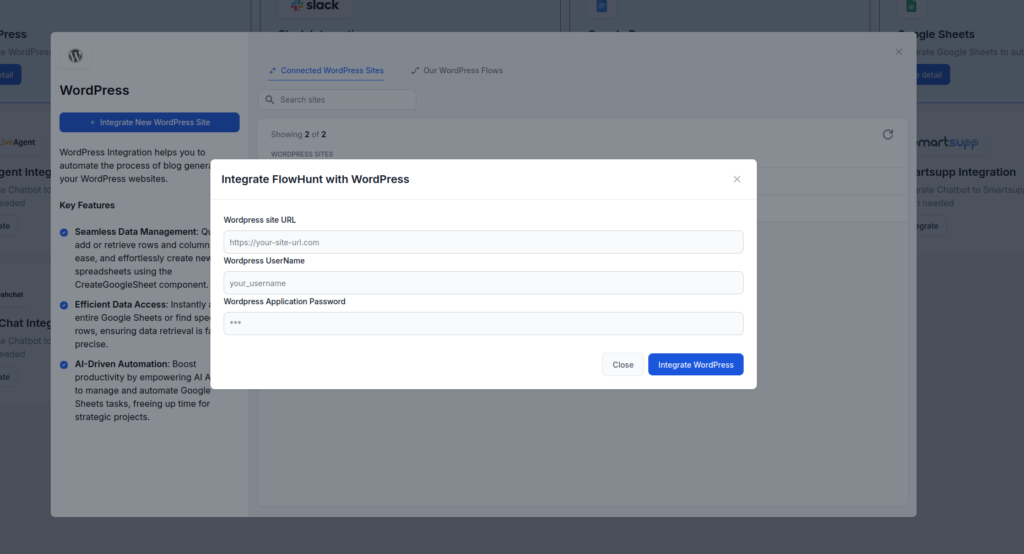
5. Input your website URL, WordPress username, and paste in your application password.
6. Click Integrate WordPress
With these simple steps, you’ve successfully linked your WordPress site with FlowHunt.
Step 2: Create The Flow
Now that your WordPress site is connected, it’s time to create a flow to automate your content generation:
1. Navigate to the Flow Library in FlowHunt.
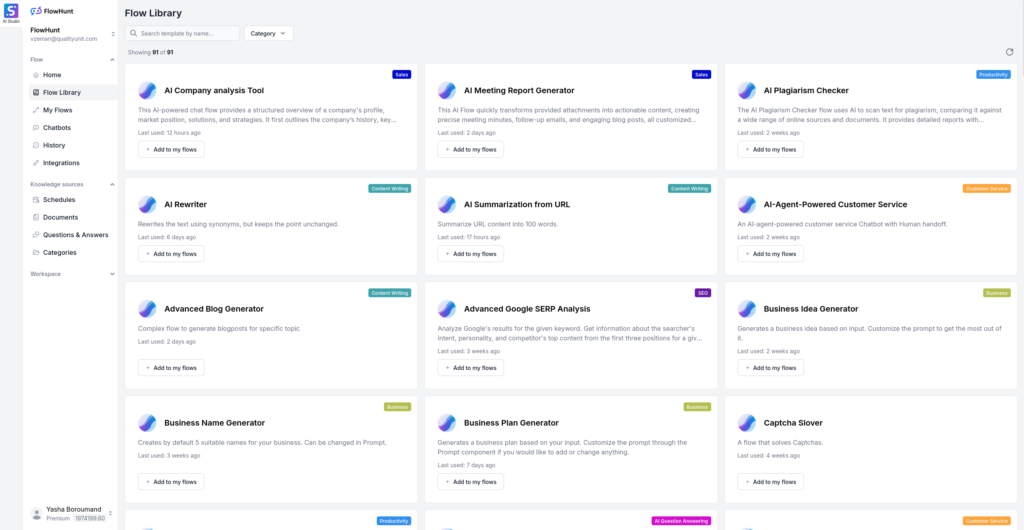
2. Choose the WordPress category from the options available.
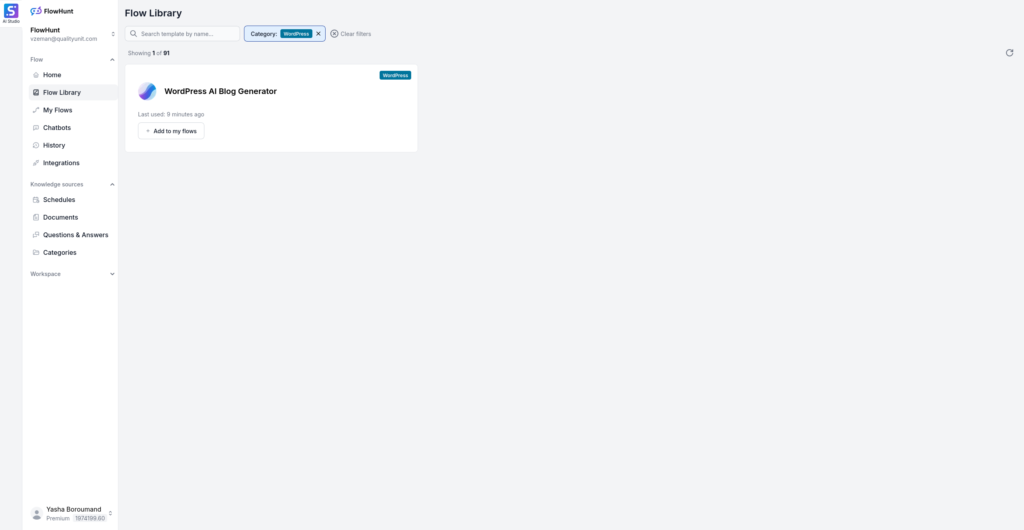
3. Add the WordPress AI Blog Generator to your flows by clicking on Add to my flows.
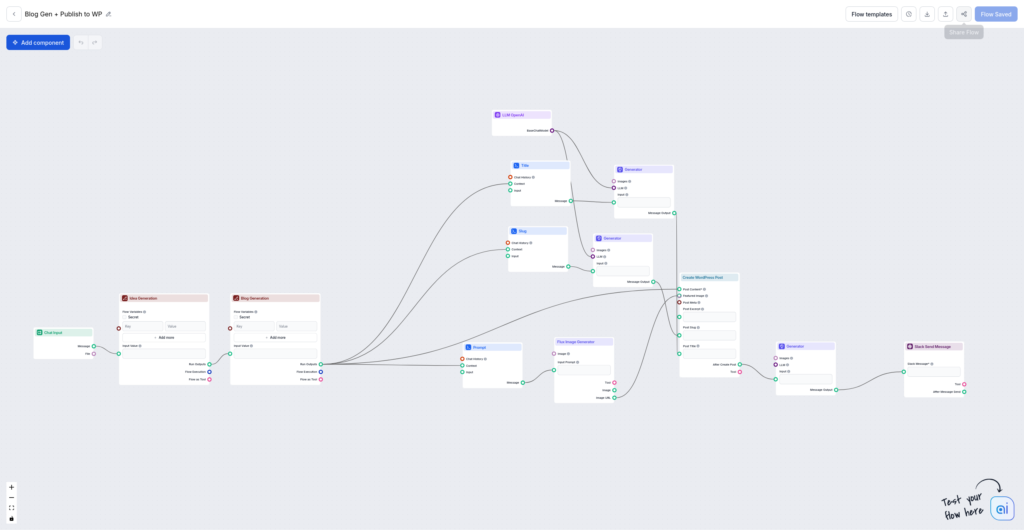
4. Inside the Flow Editor, click on the Create WordPress Post component and configure it to connect to your website.
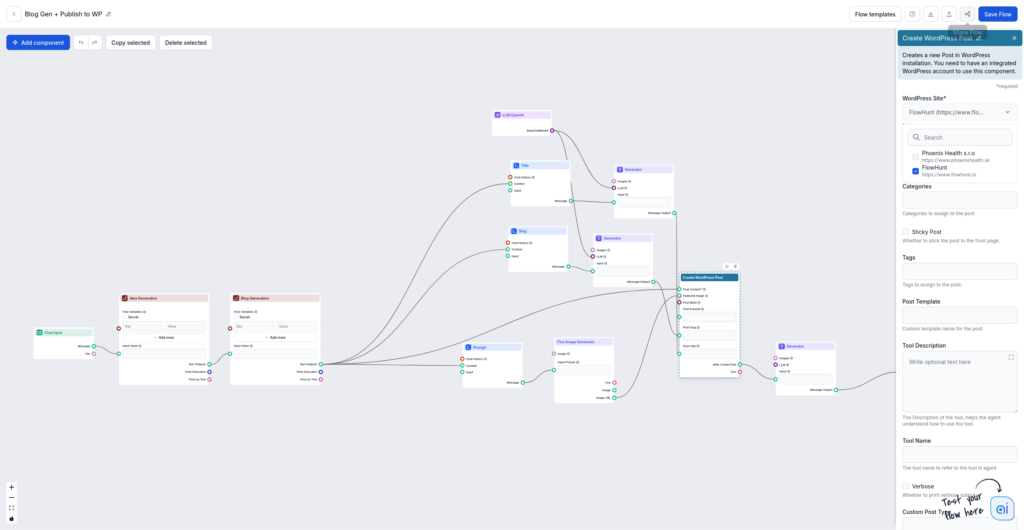
With these steps completed, you’re all set! Simply provide a keyword, and watch as the flow generates a new draft blog post on your site based on that keyword. For instance, using the keyword “AI Automation,” we created an engaging draft post effortlessly!
Bonus: Automate Your Flow Every Day at 8 AM and Get Slack Notifications
Take your automation to the next level by setting up your flow to run daily, keeping your content fresh and your team informed:
1. Click on the Cron icon located in the top bar next to the flow templates.

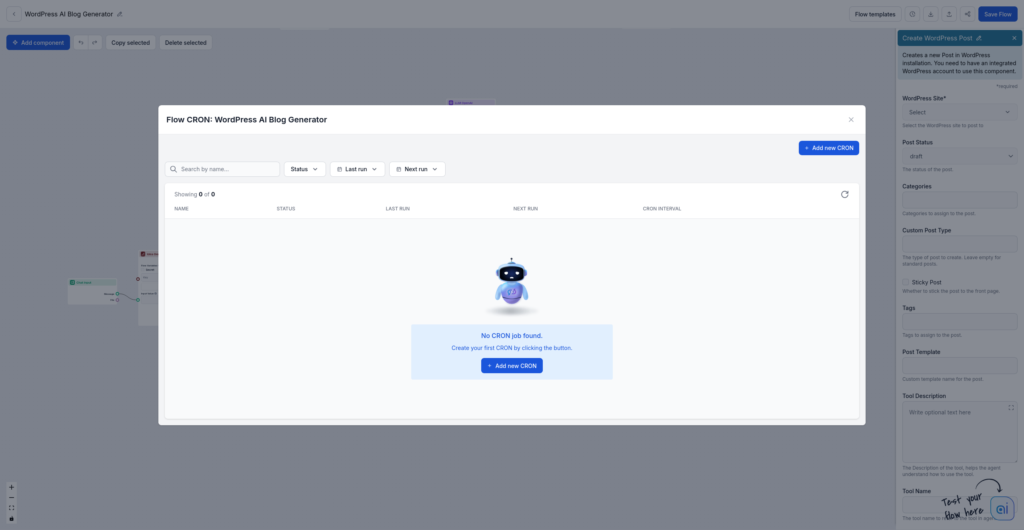
2. Create a new cron job and give it a name.
3. Specify the list of keywords you want to use as input for your content generation. When these are sent in chat input, the cron job is triggered.
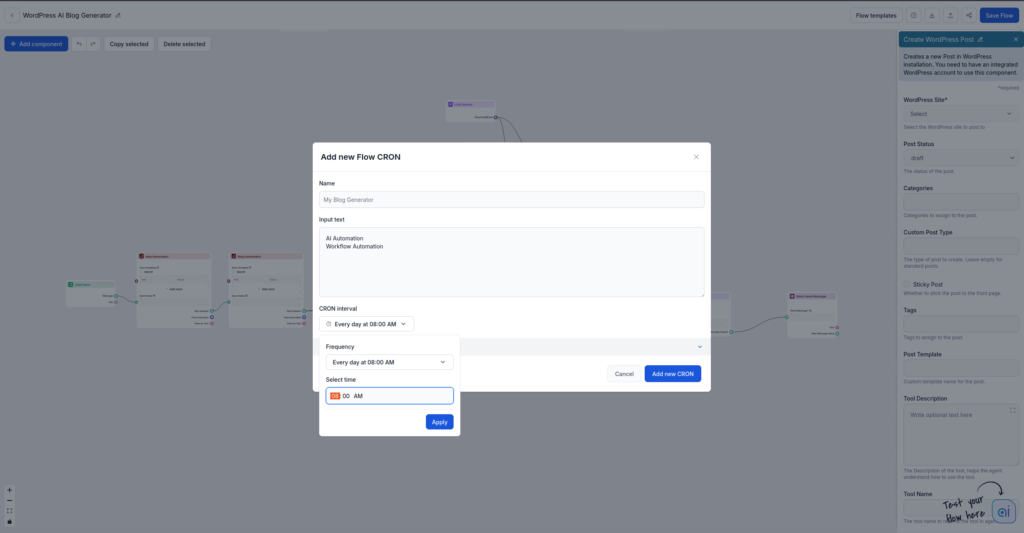
4. Set the schedule for a time that suits you—I’ve chosen 8 AM every day for daily updates.

5. (Optionally) Click the Run button to test your automation and ensure it’s set up correctly and functioning smoothly.
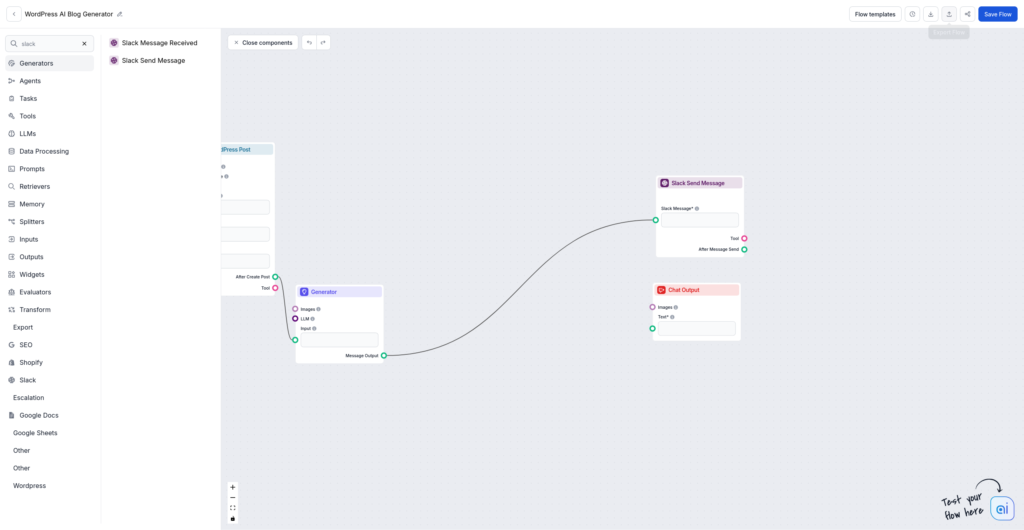
6. Now we add the Slack Send Message component. You can replace the Chat Output component. This way, the post confirmation message won’t be sent to chat, but to your specified Slack channel.
7. You need to integrate Slack for this to work. if you haven’t done so already, just follow our step-by-step guide.
8. Set up the Slack Send Message component to send the notifications to the correct channel. We recommend you create a brand new channel just for FlowHunt notifications.
In this guide, we walked through how to automate the entire WordPress post process using FlowHunt. With this setup, your blog can stay active with fresh content while you focus on other tasks. Whether you’re managing a personal blog or a content-heavy site, this automation helps streamline your workflow and maintain consistency effortlessly.
Web Page Title Generator Template
Generate perfect SEO titles effortlessly with FlowHunt's Web Page Title Generator. Just input a keyword and get top-performing titles in seconds!
Let AI take the guesswork out of SEO
Boost your SEO strategy with FlowHunt's AI-driven tools. Optimize content, analyze competitors, and uncover hidden opportunities.
