Managing your CRM contacts manually slows down your workflow and leaves room for error. This component offers a smarter way to grow and maintain your HubSpot contact list by automatically creating new records from your existing tools, conversations, and data sources.
What is The Create a Contact in HubSpot Component
The Create Contact in HubSpot component lets you automate the creation of your HubSpot contacts across all your workflows. Whether you’re gathering leads from a chatbot, a document, or a third-party app, this tool saves you time and keeps everything in sync.
Key Benefits Of This Component
- Automate Contact Creation from Any Source – automatically add contacts from chatbots, emails, Google Sheets, web directories, and third-party apps.
- Seamlessly Integrate with AI and Automation Flows – Connect with AI Agents, document retrievers, and messaging platforms to capture leads in real time.
- More Flexible and Powerful than HubSpot Alone – This component lets you pull contacts from multiple sources at once, customize associations, and trigger actions after contact creation.
- Customize and Enhance with AI – Enable AI Agents to automatically enrich contact data, validate information, and take follow-up actions.
- Trigger Post-Contact Actions Instantly – Automate workflows after adding a contact. Send notifications, update databases, or sync with other tools for further processing.
- Deep Integration with Your Existing Stack – Pull data from Google Workspace, FlowHunt knowledge base, or external APIs to create a centralized and dynamic contact management system.
Component Settings
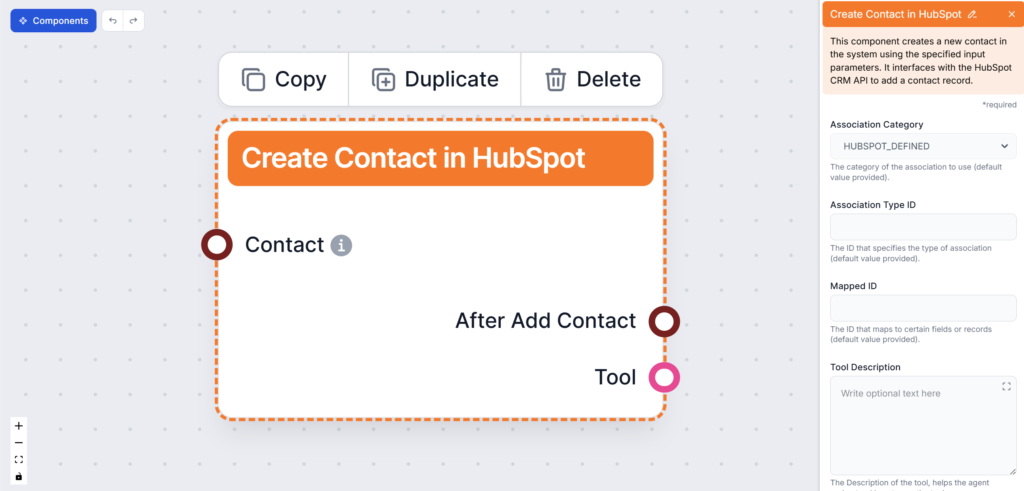
Note: This component will usually work as needed without any additional setup. All the included settings are meant to enforce the expected behavior or create specific custom use cases.
- Association Category (optional) – This setting defines the relationship between two HubSpot objects. Hubspot-defined fields are set as default. For custom associations, switch to user or integration-defined. This is an optional setting for developers. Find out more here.
- Association Type ID (optional) – Specifies the exact relationship by ID. Learn more in this HubSpot guide. This is an optional developer setting for custom use cases.
- Mapped ID – The ID of the object you’re linking to (e.g. company ID). Optional developer setting. Leave empty if unnecessary.
- Tool Description – Give additional information to help the agent understand how to use the tool.
- Tool Name – Add a name the agent should use to refer to this component in verbose output. This name is used for your convenience.
- Verbose – Pick whether the agent should show its thought process in the FlowHunt chat interface. This is especially useful for debugging.
Input Handles
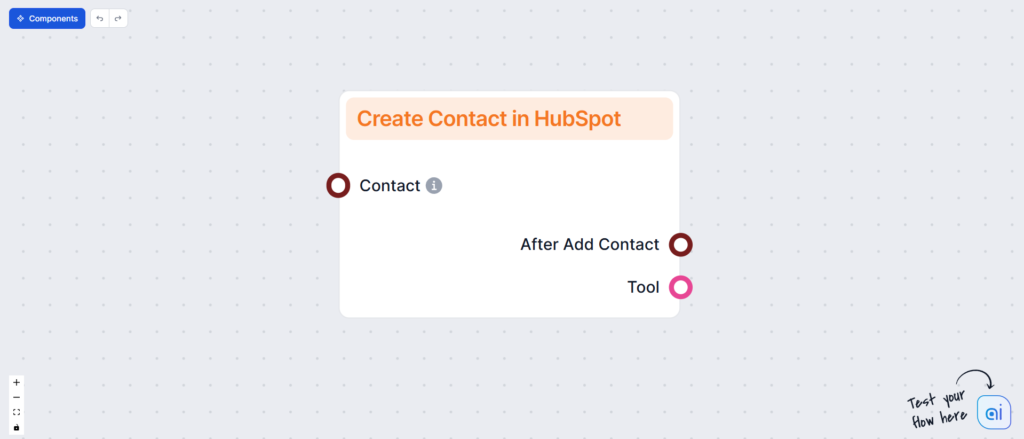
The Contact Input handle serves to connect contact sources. You can connect up to 20 different components here, ranging from AI Agents and data components to document retrievers and messaging apps integrations.
Alternatively, the information can simply be sent via the Chat Input. For example, whenever a customer shares their information with the chatbot, the AI agent will correctly identify it and use the Create Contact component.
Output Handles
Tool: Connect the component to an AI Agent as a tool. This is the main output handle, allowing the agent to use this component to create new contact records.
After Add Contact: Connect components to specify actions that should occur after contact creation. For example, you can set up Slack notifications, automatically update Google Sheets, or further process the data.
How To Use The Create Contact in HubSpot Component
You can use this component in any workflow where customer data appears. From chat conversations to internal documents, you can automatically capture contact information and create new records.
Popular use cases include:
- Information shared via chatbot, Facebook Messenger, email, or WhatsApp,
- Importing from Google Workspace documents and sheets
- Importing from Google Calendar
- Importing from other uploaded documents, files, and your FlowHunt knowledge base
- Crawling websites to grab contact information
- Using the API to connect to other 3-rd party apps, such as Zapier
Note: We recommend you use this component along with Update Contact in HubSpot, so you can enrich existing customer records and avoid creating duplicates.
Let’s see the component in action. For this example, we’ll create the simplest possible customer support chatbot and test it with a query that calls for lead generation.
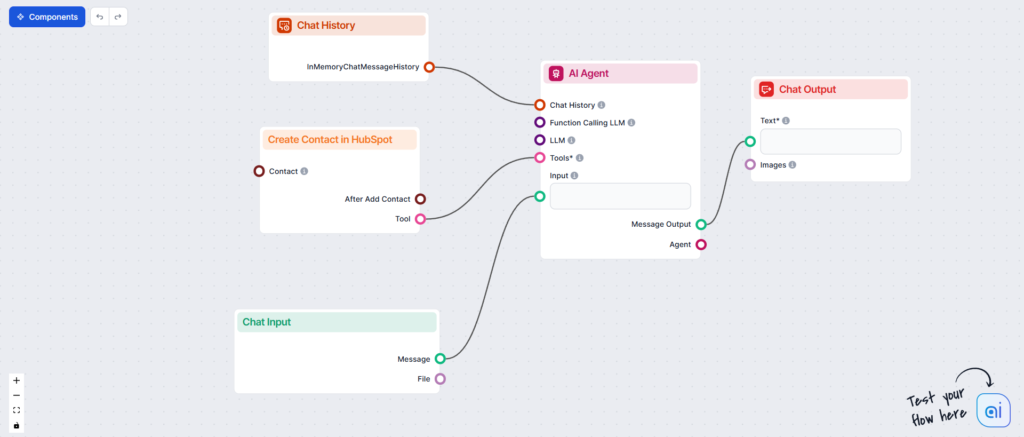
Let’s take a closer look at this Flow. The Create Contact in HubSpot component is connected to the AI Agent as a tool. This means the agent can independently decide when and how to use this tool.
We did not connect any input sources for this example, since we will be simulating a customer service situation and inputting the contact information via chat, but feel free to connect data sources or pick one of our pre-made HubSpot Flows to fit your needs.
Since we’re creating a chatbot example, we can’t omit the chat input and output components, as well as chat history. This is all we need to test out the Create Contact in HubSpot component.
Let’s set the scenario. A potential customer wants to discuss an enterprise offer. That is the type of conversation you surely don’t want to miss. But what if there are no agents available to take the message at this time, or if this chatbot doesn’t have handoff enabled?
The chatbot will determine that it cannot connect the lead to a human agent at this moment. So instead, it will offer to take their contact information with the promise of you reaching out asap:
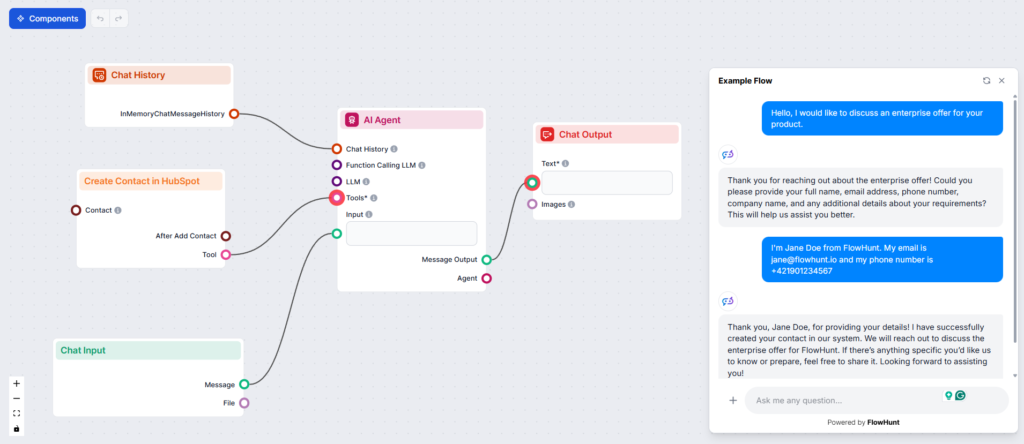
Now let’s look into our HubSpot CRM:
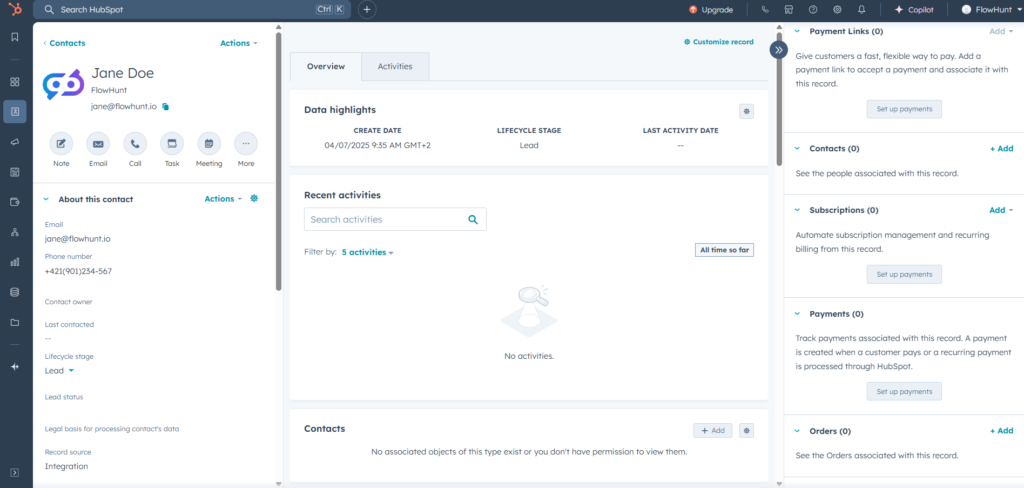
Jane Doe has been successfully created, and all the information from the chat is correctly associated. On top of it, the Agent identified the correct lifecycle and status.
The last step to never missing a lead is setting up notifications about new leads. You can either do it with a contact owner workflow in HubSpot, or you can check out our Slack Send Message component and automate lead notifications to Slack.
